Imagine this – water suddenly pours through your ceiling or rises from your basement floor. Your response in the first few hours after water damage can make all the difference. Many homeowners panic when unexpected flooding or leaks strike. We’ve watched water quickly destroy flooring, walls, furniture, and precious belongings. Here’s the good news – quick, decisive action can reduce the damage and repair costs by a lot. This piece outlines five crucial steps you must take right after water damage hits your home.
Let us guide you through each vital step, from ensuring safety to calling a professional. With the right approach, you can save thousands in repairs while protecting your home from long-term issues like mold growth.
Table of Contents
-
Stop the Source and Ensure Safety
-
Document the Damage for Insurance
-
Call Professional Water Damage Restoration Services
-
Begin Water Removal and Drying
-
Repair, Restore, and Prevent Future Damage
-
Conclusion
-
FAQs
These practical tips are designed to help you manage water damage with confidence whether you’re facing an emergency right now or simply preparing for the future with trusted water damage restoration services.
Step 1. Stop the Source and Ensure Safety
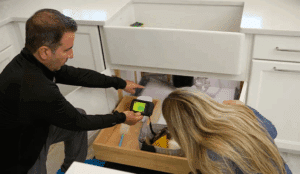
When water shows up where it shouldn’t, every minute matters. The first step is to stop the source. Check for burst pipes, broken appliances, or rainwater seeping in. For plumbing issues, turn off your home’s main water shut-off valve, usually found in the basement, crawlspace, or near the main line entry. Appliances often have their own shut-off valves. If the water comes from heavy rain or flooding, use sandbags, buckets, or mops to redirect and remove it quickly.
Safety comes first. Water and electricity don’t mix, so turn off power to affected areas before stepping into standing water. If you can’t safely reach your electrical panel, call an electrician or utility company. Be aware of structural risks too, such as sagging ceilings or buckling floors, which may collapse without warning.
The type of water matters. Clean water usually comes from pipes or rain and requires basic precautions. Gray water from appliances may contain mild contaminants, so gloves are recommended. Black water from sewage or flooding is highly dangerous and should only be handled by professionals. In some cases, leaving your home may be the safest choice, especially with sewage, heavy flooding, or electrical hazards. Always prioritize your family’s well-being over belongings.
Step 2. Document the Damage for Insurance
Once your family is safe and the water source is stopped, your next step is documenting the damage. Good records are critical for your insurance claim. Many homeowners lose thousands simply because they didn’t capture enough proof.
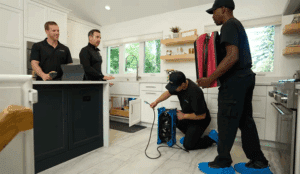
Timing matters. Take photos and videos before any cleanup begins to show the full extent of damage. Start with wide shots of each room, then zoom in on details like water levels, damaged walls, ceilings, floors, and personal items. Include the source of the water, such as a burst pipe or roof leak, as well as any mold or stains.
Keep a detailed inventory of damaged items. For each one, note the description, approximate purchase date, estimated value, extent of damage, and whether it can be restored or needs replacement. This list makes discussions with adjusters smoother and prevents delays.
Call your insurance company as soon as possible, ideally within 24 hours. Have your policy number ready and write down the representative’s name, date, and instructions. Most insurers will send an adjuster, so gather supporting documents like receipts, home inventories, and repair records to strengthen your claim. Keep receipts for emergency expenses, such as temporary housing or urgent repairs, since these may be reimbursed.
Step 3. Call Professional Water Damage Restoration Services
Once you’ve stopped the water and documented the damage, it’s time to call in the experts. Many homeowners try DIY fixes, but water damage restoration requires professional equipment and training. Without quick action, mold can start growing within 24 hours, and soaked materials may weaken, turning small issues into costly repairs.
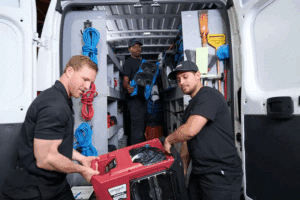
Professional restoration companies like DRYmedic do more than just remove water. They bring years of experience, industry certifications, and specialized tools. Industrial extractors, dehumidifiers, and thermal imaging equipment allow them to eliminate hidden moisture
When choosing a restoration service, look for:
- 24/7 emergency response
- Licensed and insured professionals
- Experience with insurance claims
- Positive customer reviews
- Full services beyond water removal
The process begins with a detailed inspection. Experts identify visible and hidden damage, then create a custom restoration plan. A burst pipe in the kitchen and a flooded basement require different strategies. Professionals know how to adapt their approach. Working with insurance is another major advantage. Restoration teams document damage the way adjusters expect and can communicate directly with your insurance company, reducing stress and speeding up claims.
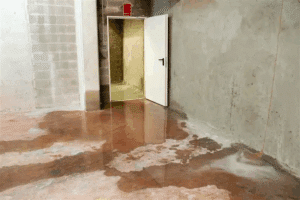
Professional restoration also goes beyond drying. Teams clean, sanitize, and remove odors from affected areas to ensure your home is safe and livable. They monitor moisture levels scientifically, making sure all materials reach safe levels before repairs begin. For larger damage, many companies also handle repairs, flooring, painting, and furniture restoration, saving you from hiring multiple contractors.
Step 4. Begin Water Removal and Drying
Once professionals arrive, the first priority is fast water removal. Quick extraction makes all the difference in how quickly your home recovers and how much lasting damage you avoid. Industrial-grade extractors remove hundreds of gallons from carpets, floors, and furniture in a fraction of the time it would take with household wet/dry vacuums.
But water damage isn’t just about what you see. Moisture often hides inside walls, beneath flooring, and in structural materials. If left untreated, this hidden water causes warping, deterioration, and mold growth. That’s why professionals use thermal imaging cameras and moisture meters to detect water in hard-to-reach places.
A typical extraction and drying process includes:
- Removing standing water with pumps and powerful extraction units
- Pulling water from carpets, padding, and fabrics with specialized tools
- Using air movers and commercial dehumidifiers to speed up evaporation
- Tracking progress with precise moisture readings
Sometimes, controlled demolition is necessary. This might mean removing damaged drywall, insulation, or flooring that won’t dry properly. While it may feel disruptive, it prevents future issues and usually saves money in the long run.
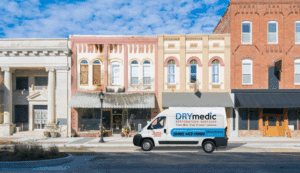
Drying isn’t just about airflow, it’s a science. Technicians calculate the right balance of temperature, humidity, and air circulation for your home’s materials. They also apply antimicrobial treatments to reduce the risk of mold, especially in areas that take longer to dry.
Step 5. Repair, Restore, and Prevent Future Damage
Once the water is removed and your home is fully dried, the final phase begins: restoring your property to its original condition or even better. This is where your house becomes a home again. Professional restoration teams go beyond surface-level fixes. They address both visible and hidden damage to prevent future issues like structural weakness or mold growth. Common repairs and restorations include:
- Drywall repair or replacement
- Flooring restoration or new installation
- Cabinet and trim reconstruction
- Structural repairs to framing or supports
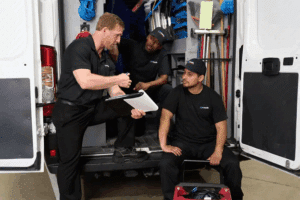
Attention to detail is what separates professional restoration from quick patch jobs. Certified teams inspect every area carefully, follow industry standards, and often provide warranties on their work for added peace of mind. But recovery doesn’t end with repairs—it’s also the perfect time to think about prevention.
Homeowners can take smart steps such as installing water detection sensors, upgrading to water-resistant materials, improving drainage around the foundation, and scheduling regular plumbing or roof inspections. These upgrades reduce the risk of another water damage disaster down the road.
Conclusion
When water damage strikes, quick and careful action makes all the difference. The first steps stopping the water, ensuring safety, and documenting the damage lay the foundation for recovery and smooth insurance claims. Professional restoration services then step in with specialized equipment and proven methods to remove water, dry hidden moisture, and repair your home.
Their expertise not only restores what was lost but also prevents future problems like mold or structural issues. With proper repairs and preventive upgrades, your home returns to its best condition. Acting fast protects your property, saves money, and brings peace of mind.
FAQs
What should I do immediately after discovering water damage in my home?
The first step is to ensure safety by turning off electricity to affected areas. Then, locate and stop the water source if possible. After that, document the damage thoroughly with photos and videos for insurance purposes.
How quickly should I contact professional water damage restoration services?
You should contact professional water damage restoration services as soon as possible, ideally within 24 hours of discovering the damage. Quick action can significantly minimize damage and prevent secondary issues like mold growth.
What items should I prioritize saving during a water damage emergency?
Focus on saving irreplaceable items such as important documents, family photos, and sentimental belongings. Also, prioritize removing electronics and valuable furniture from affected areas if it’s safe to do so.
How long does the water damage drying process typically take?
The drying process can take anywhere from a few days to several weeks, depending on the extent of the damage and the materials affected. Professional restoration services use specialized equipment to accelerate the process and ensure thorough drying.
What steps can I take to prevent future water damage in my home?
To prevent future water damage, consider installing water detection devices, upgrading to water-resistant building materials, improving drainage around your home’s foundation, and scheduling regular inspections of plumbing, roofing, and appliances.
Protect Your Home After Water Damage
→ Immediate response steps to reduce risks and prevent further property loss
→ Scalable restoration solutions to keep recovery smooth and affordable
→ Expert support to restore safety, protect belongings, and speed up the process
Take control of your home’s recovery discover the essential steps to handle water damage today →
★★★★★ Rated 5/5 by 26 homeowners for reliable restoration services.